
Cellular connectivity is the most favorable way of connecting IoT devices. However, other use cases may encompass many local devices that do not need a SIM card but communicate with a gateway/router. The IoT router is therefore equipped with an emnify SIM and sends the aggregated data through a cellular network to the desired cloud service. Common examples are utility sensors in a building communicating with a smart meter gateway or web servers running in a local network behind a router. Having one device communicating with a platform via cellular connectivity increases efficiency and reduces complexity. But what if you wanted to remotely access a specific device behind the router, for troubleshooting or configuration purposes?
In this blog post I will take you through the necessary steps to remotely access a device behind a router using the remote management system of Teltonika, a raspberry pi hosting a web server behind the router, and a Teltonika router connected with an emnify SIM card.

What do I need?
- Router (I used the Teltonika RUT240)
- Raspberry Pi (Model 3) hosting a web server or any other device you want to access behind the router
- emnify IoT SIM
Preparation:
If you have not ordered or registered an emnify SIM yet, you can do so by signing up on the emnify portal. You will get an trial pack including a 10€ free prepaid IoT SIM. Follow this Quick Start Guide to register your SIM card. Then assign the SIM to an endpoint named after the router, in my case I named it “Teltonika RUT240”.
4 Steps Navigation
1. Connecting and Setting up the Router
2. Adding the Router to Teltonika RMS
3. Connecting the IoT Device to the Router
4. Adding an Remote HTTP access in RMS
Connecting the Router to the emnify platform with our IoT multi-SIM
Insert the SIM card into the router and attach the two mobile and one WiFi antennas. Plug it in, and connect it to your computer via the provided ethernet cable. Make sure the ethernet cable is in the LAN port of the router. Type the default IP address printed on the router (192.168.1.1) into your browser to access the router’s configuration settings. You will be prompted to login, using “admin/admin01” as a username/password.
The Setup Wizard will take you through 5 steps, in which you can set up network details. Make sure that in Step 5 - RMS the connection type says enabled.
For a more detailed walkthrough on the router setup, watch this video by Teltonika Networks.
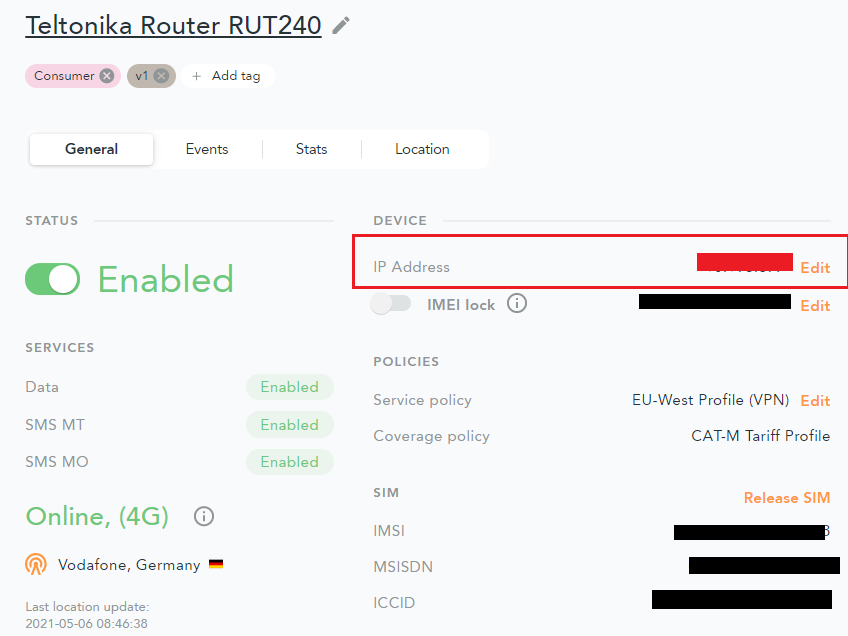
Check the emnify portal to see if the device is online. The IP Address shown below in the red box is the static IP address assigned to your router, which can be used to access and troubleshoot the device itself using emnify’s OpenVPN service.
Adding the Router to the Remote Management System
To add your router to the Teltonika RMS service, you need an RMS account. If you have not already set one up, type in rms.Teltonika.lt into your browser and complete the registration.
On the left side of RMS portal, click on Devices below Management. Now in the upper row of drop-down menus, hover over Device and click Add Device.
Select your Company and device model type (RUT here), give the device any Name and fill in the Serial Number and LAN MAC Address fields (Both are printed on the device itself).
Click Submit.
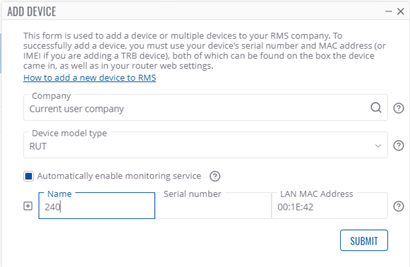
Now you should see an Action Status window, where the system is waiting for the device to connect as shown below: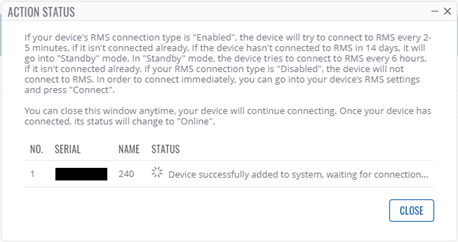
After a short while, the connection will be established and the Action Status window will display the following:
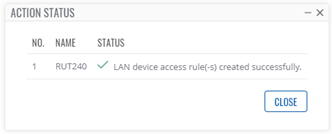
The Device should now be shown on the Management Devices page in RMS.
Connecting the Raspberry Pi to the Router
Our Raspberry Pi is running a web server for demonstration purposes, which we would like to remotely access using the Teltonika RMS platform. But before we set up the remote access, we must connect the Raspberry Pi to the Teltonika router’s internet via ethernet cable.
First, disconnect the ethernet connection between the Teltonika router and the PC. We need the LAN port of the router to connect to the Raspberry Pi. Then connect the Raspberry Pi to the Teltonika router with the ethernet cable. Now connect your PC to your own WiFi again.
Another great feature of the RMS is that you can access the router's settings / WEB UI through RMS, without being in the same network as the router. We will need to access the router’s settings to check the assigned IP Address of our Raspberry Pi hosting our web server.
Back on the Management Devices page in RMS, the previously added router should be listed, with a green status dot indicating a healthy connection. In the Actions column of the device table, there are four icons. Click the circled icon shown below:

In the Pop-up Window, click Generate to create a time limited access link to your router’s settings. Then click on the link itself. You may need to log into your router again, now with your new password.
Inside the router’s settings, navigate to Status Network LAN
The Raspberry Pi (called catm2 here) should be listed as shown below: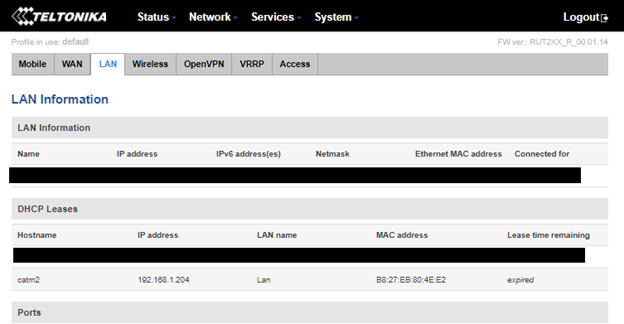
Copy the displayed IP Address of the device and save it temporarily.
Log out of the router’s settings and go back to the RMS portal.
Adding a Remote HTTP access in the RMS portal
We now have all the necessary things to create a remote HTTP access to the web server running on our Raspberry Pi.
On the left side of the RMS portal, click on Remote HTTP(S) below RMS Connect. Then click Add New Remote+
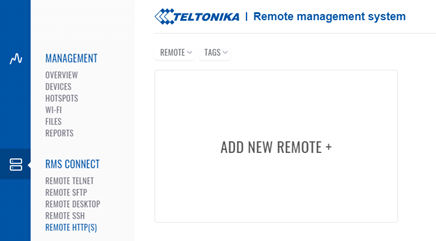
In the pop-up menu, select manual instead of auto-scan. Give your Remote Connection a name, here I used “rPi web server”.
Insert the IP Address of the web server (on our Raspberry Pi) that you noted down earlier. The default port is 80.
Select a protocol type, in this example we use HTTP.
Then select a device registered to your RMS account, so a router which the web server is running on, in our case that is the RUT240 we set up.
Click ADD.
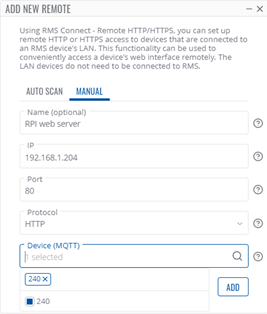
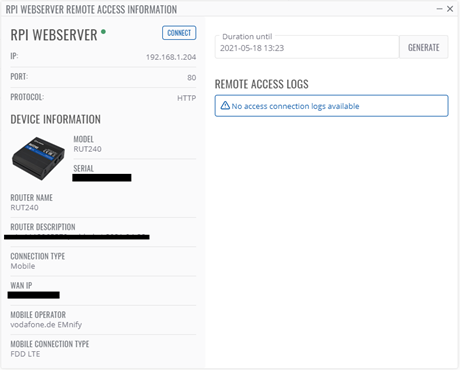
Click on your newly created Remote. To connect to your web server running behind your Teltonika router, click connect at the top of the pop-up window.
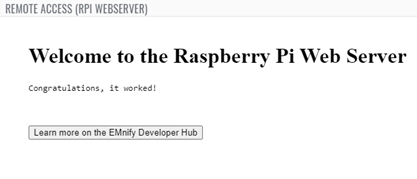
If everything worked, you should see your web server in a new pop-up window, as shown below.

Product Manager at EMnify.


